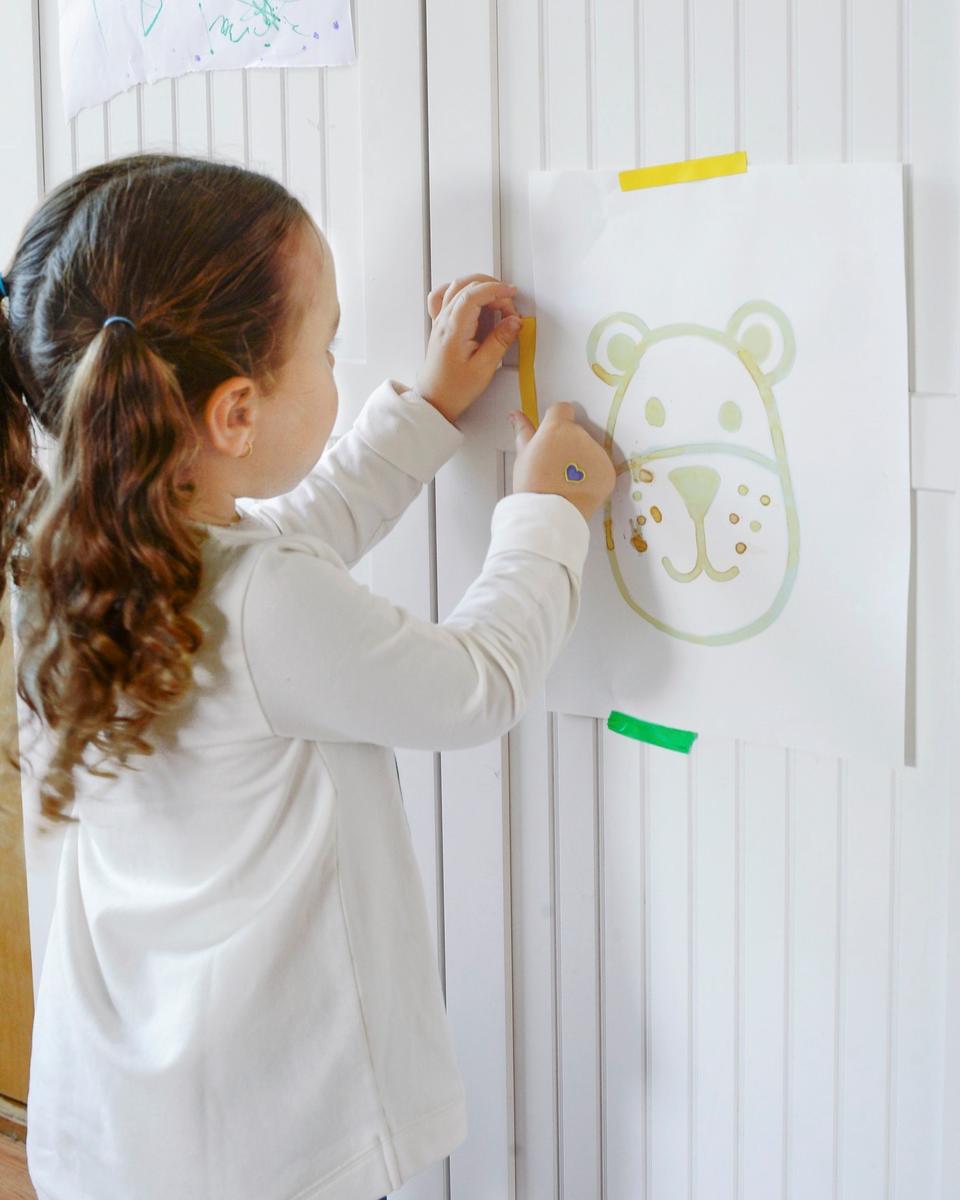
We know it feels like winter will never end, but we promise that it will. For those moments when it seems like spring can’t come soon enough and your toddler is sick of the same old same old, ring in the spring with these fun spring crafts.
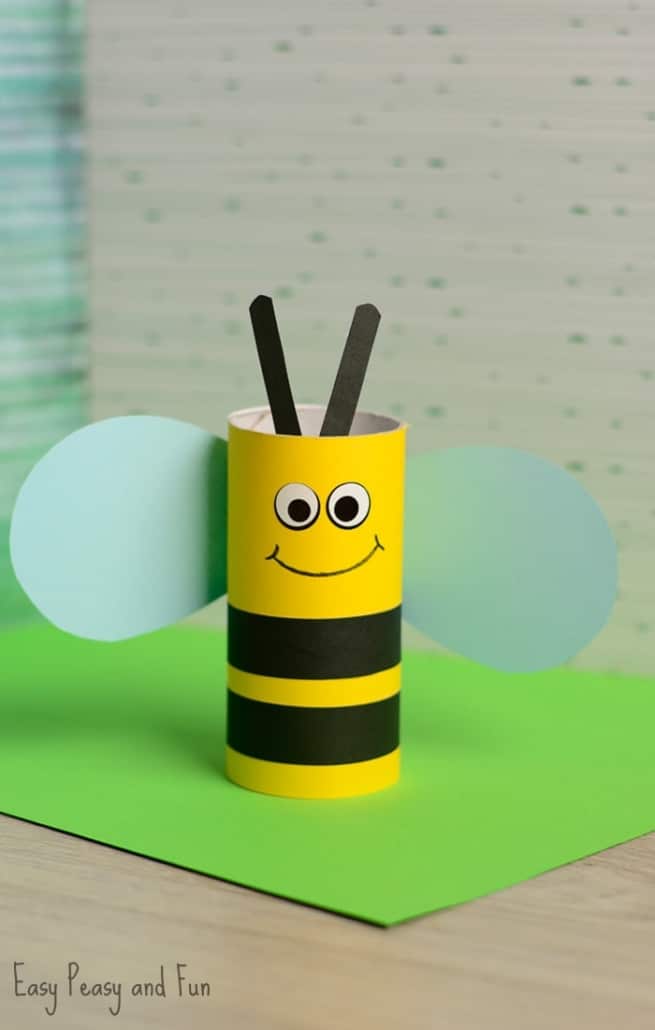
TP Bee
Bees are perhaps the perfect mascot for spring, and toilet paper roll projects are just so fun. This easy and festive activity is perfect for all ages.
You will need:
- Empty toilet paper roll
- Wiggly eye stickers
- Construction paper in yellow, light blue, and black
- Scissors
- Glue stick
- Black marker
Directions:
- Cut a strip of yellow paper, as wide as the toilet paper roll. Next, apply glue to the toilet paper roll and adhere the yellow paper by wrapping it around the roll. Cut off any excess yellow paper.
- Cut thin strips out of the black paper. These are the bees’ stripes. Apply glue to the stripes and wrap them around the yellow roll.
- Cut 2 wings out of the light blue paper. Apply glue to the ends of the wings and adhere to the back of the body of the bee.
- Decide where you want the face of your bee. Take two of the wiggly eye stickers and apply them to the roll. If you’re feeling fun, feel free to draw a smiley mouth beneath the eyes.
- Using the black paper, cut two very thin pieces. These are the bees’ antennae. Glue the antennae to the inside of the toilet paper roll above the googly eyes. Buzz buzz! You have a bee!
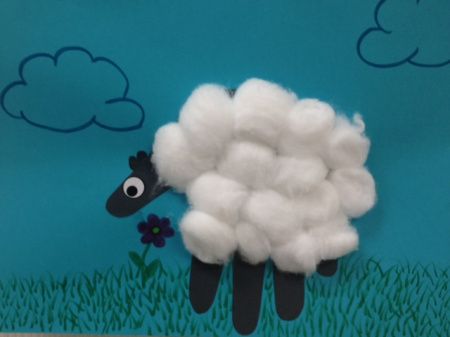
Handprint Easter Lamb
This craft is a spring classic. They say that spring comes in like a lion and goes out like a lamb. This craft honors the lamb.
You will need:
- Cotton balls
- A sheet of colored construction paper
- White school glue
- Black acrylic paint
- One googly eye
- Markers
- Paintbrush
Directions:
- Using a paintbrush, cover your hand in black acrylic paint. Immediately press your hand onto the construction paper. Make sure you don’t slide your hand around. Instead, quickly press your hand down and lift up.
- Wash off your hand with soap and water immediately. It’s easier to wash off while the paint is still wet.
- Using a small dab of glue on each cotton ball, apply the cotton balls to the palm of the handprint. Form a fluffy and thick sheep body.
- The thumb will be the face. Glue the googly eye onto the thumb. Draw little ears with the black marker if you want to add more detail.
- Give the sheep a background. Maybe draw some grass for the sheep to munch on, a sun in the sky, or some flowers near its feet. This is time to let your creativity shine!
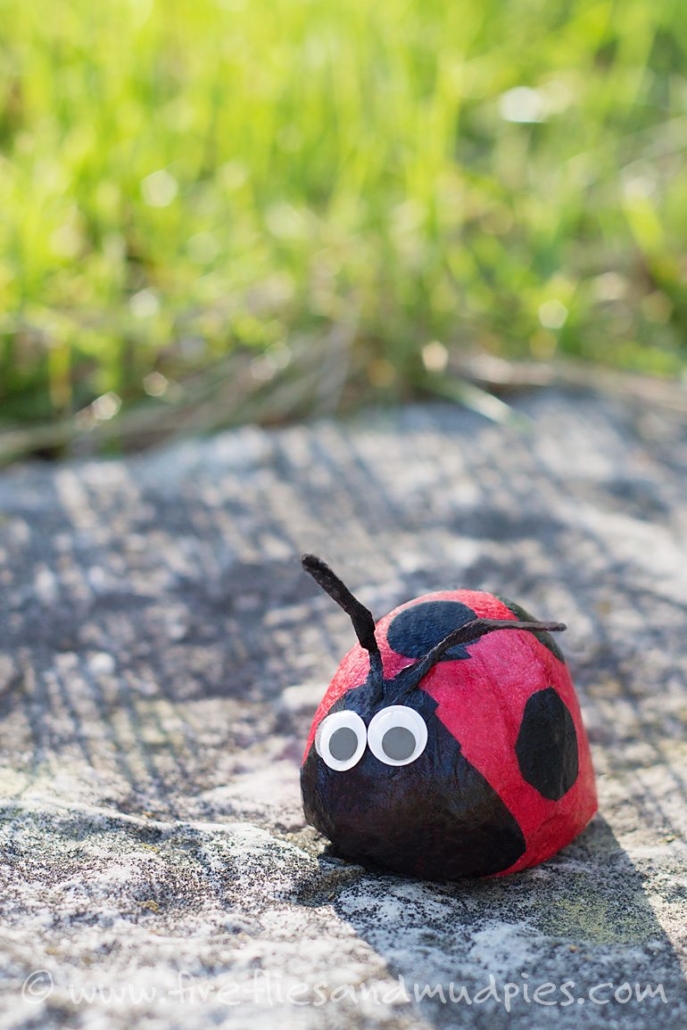
Ladybug Pet Rock
This activity is a great way to get your child excited about springtime and all the creatures that accompany the warmer weather! Plus, who doesn’t love a pet rock?
You will need:
- A stone
- Red and black tissue paper
- Googly eyes
- Scissors
- Paint brushes
- Paint
- Mod podge
Directions:
- This spring craft begins with some outdoor time. First, you have to find a stone that you want to paint. We chose a relatively symmetrical, slightly oval shaped stone with a smooth texture. Remember, whatever stone you use you have to paint and decoupage, so don’t choose something too rough! Once you’ve picked one out, wash and dry your stone.
- When your stone is dry, decoupage the whole stone. Place the red tissue paper onto the stone, and then paint over the tissue paper with Mod Podge.
- Decoupage the details. Cut out some small black circles from the black tissue paper. These are your ladybug’s spots. Cut out a larger black circle that you will use for the face of the ladybug. On the top of the rock, apply the ladybug spots with Mod Podge. On the front of the rock where you want the face of the ladybug to be, apply the large circle. Cover with Mod Podge.
- Make the ladybug antennae. Twist strips of tissue paper between your fingers, then coat the antennae in Mod Podge. Use the wooden end of your paintbrush to adhere the antennae to the ladybug body.
- Give the ladybug eyes. The final finishing touch to your ladybug are its googly eyes. Using Mod Podge, attach 2 googly eyes to your new pet. Let the stone dry and enjoy your new ladybug pet rock.
Rain or Shine Cloud
Between winter and summer, there are many rainy spring days. This spring craft reflects both aspects of spring: the warm sun, and the rainy clouds.

You will need:
- Blue construction paper
- White construction paper
- Cotton balls
- Paper plate
- Yellow paint
- Glue
- Clear tape
- Scissors
- Yarn
- Paint brush
Directions:
- Using your scissors and your white construction paper, cut out a cloud shape.
- On your blue construction paper, cut out many raindrops. Set aside.
- Cut a few long strings of yarn. Then, glue the yarn to the back of the cloud with clear tape. Evenly distribute the yarn across the cloud so the yarn strings have enough space for you to glue on raindrops without overlapping.
- Attach the raindrops to the yarn using clear tape.
- Paint the paper plate yellow so it is bright and solidly colored. Allow the paint to dry.
- Cut out sun rays on the sides of the plate. Either cut out small rectangles, or small triangles.
- Next, you’re going to tape your sun to the back of your cloud. Make sure that you’re glueing the yellow front of your sun to the back of your cloud. Apply a generous amount of glue to the cloud and adhere the sun.
- It’s finally time to fluff the cloud. Apply glue to the front of the cloud and press on the cotton balls until you have a fluffy white cloud.
- Hang your rain and shine cloud up for the world to see!
Caterpillar Pom Pom Craft
Finding a caterpillar in nature is so fun. Creating a caterpillar in a craft is even better!
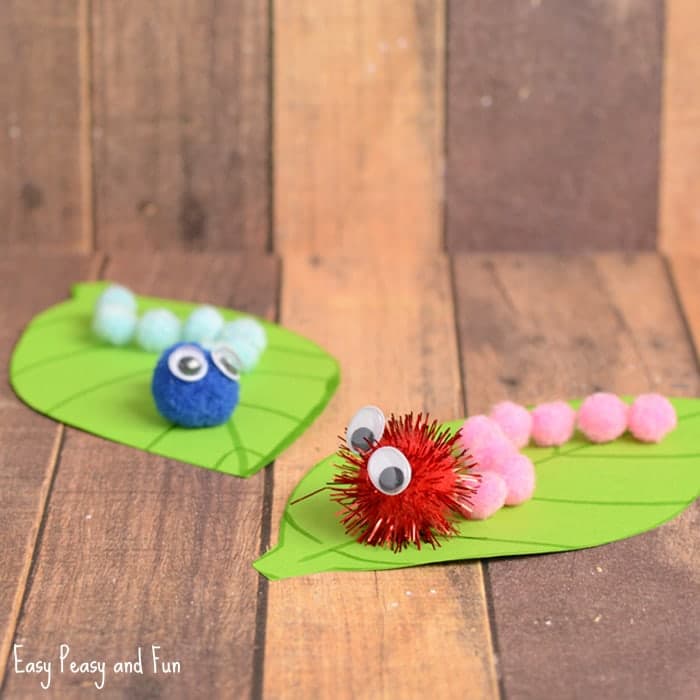
You will need:
- Pack of pom poms
- Googly eyes
- Green construction paper
- Green marker
- White Elmer’s glue
- Dark green marker
- Scissors
Directions:
- Using your green marker, draw a leaf on your green construction paper. The leaf should be about as big as an adult hand.
- Cut out your leaf shape.
- Using your glue, apply an S shape line of glue down the body of the leaf.
- Place pom poms onto the line of glue. That’s the caterpillar’s body.
- On a large pom pom, glue two googly eyes. Glue the large pom pom with googly eyes onto the front of the caterpillar pom pom body. You have made a caterpillar!
We hope that these spring crafts have helped keep your winter blues at bay. Remember, there is always another sunny day waiting for you. In the mean time, create some cheer with crafts.


